Search This Blog

Thursday, January 5, 2012

Hướng dẫn load IOS cho switch bằng cổng console

Load IOS cho switch bằng cổng Console .


Step 1 . Chỉnh thông số baud rate trên switch lên tốc độ 115200 bps . Gõ lệnh : set BAUD 115200

http://img217.imageshack.us/img217/5201/34221497ek0.gif

Sau khi gõ lệnh này vào , ta sẽ không console được vào switch nữa , vì tốc độ console chỉnh trên chương trình Secure CRT không khớp với tốc độ trên cổng console của switch .

Step 2 . Chỉnh lại tốc độ console trên chương trình SecureCRT .

http://img75.imageshack.us/img75/6623/97129332yn5.gif

http://img111.imageshack.us/img111/6168/29721976mp3.gif

Step 3 . Gõ lệnh : copy xmodem: flash:c2960-lanbasek9-mz.122-25.SEE4.bin

http://img212.imageshack.us/img212/3673/53968149ij4.gif

Step 4 : Chọn Tranfer / Send Xmodem

http://img225.imageshack.us/img225/4051/16833689dr1.gif

Step 5 : Chọn IOS cần load và nhấn SEND

http://img225.imageshack.us/img225/7335/85495910hr2.gif

Step 6 : Chờ đợi

http://img205.imageshack.us/img205/4774/39306558kx6.gif

Step 7 : Sau khi load xong IOS , chỉnh lại tốc độ console về mặc định bằng lệnh set BAUD 9600

http://img233.imageshack.us/img233/2728/54980191zj3.gif

Step 8 : Chỉnh lại tốc độ console trên chương trình Secure CRT

http://img233.imageshack.us/img233/6329/88647688or8.gif

Step 9 : Khởi động Switch bằng lệnh boot

Kết thúc nạp IOS cho switch .

Thursday, September 29, 2011

Tang dung luong file upload cho Tomcat Apache

Problem

When uploading a WAR file larger than 50 MB, the Tomcat 7 Manager application reports:

The server encountered an internal error () that prevented it from fulfilling this request.

Exception java.lang.IllegalStateException:

org.apache.tomcat.util.http.fileupload.FileUploadBase$SizeLimitExceededException:

the request was rejected because its size (XXX) exceeds the configured maximum (52428800)
Solution

    Go to the web.xml of the manager application (for instance it could be under /tomcat7/webapps/manager/WEB-INF/web.xml.
    Increase the max-file-size and max-request-size:

<multipart-config>

<!– 50MB max –>

<max-file-size>52428800</max-file-size>

<max-request-size>52428800</max-request-size>

<file-size-threshold>0</file-size-threshold>

</multipart-config> 


Nguon Internet.

Cài đặt Apache Tomcat 7 trên Centos 5/RHEL 5

Bài viết này sẽ hướng dẫn cài đặt Apache Tomcat 7 trên Centos 5. Thông tin về Apache Tomcat và những tính năng mới cũng như những cải thiện trong phiên bản 7 có thể tham khảo tại đây.
Trong bài viết này chúng ta sẽ cài JDK, Apache Tomcat 7 và cấu hình Apache Tomcat tự động chạy lúc Centos khởi động cũng như cấu hình Apache Tomcat chạy dưới quyền người dùng (user) bình thường.
Để bắt đầu chúng ta sẽ cài đặt JDK. Apache Tomcat 7 yêu cầu tối thiểu là JDK 1.6!
Bước 1: Cài đặt JDK
Có thể bỏ qua bước này nếu đã cài phiên JDK tối thiểu mà Apache Tomcat 7 yêu cầu.
Chúng ta sẽ tiến hành tải JDK tại : đây. Chúng ta tải bản JDK mới nhất, vào thời điểm viết bài này bản JDK mới nhất là : JDK 6 Update 25, tùy vào phiên bản hệ điều hành đang sử dụng để chọn và tải JDK phù hợp. Ở đây do chúng ta đang sử dụng Centos 5 (32bit) nên chúng ta đã tải được bản tập tin : jdk-6u25-linux-i586.bin và lưu nó ở /root/java/ bây giờ chúng ta sẽ tiến hành cài đặt JDK theo các bước sau :
[root@centos-server java]# mkdir /usr/java/
[root@centos-server java]# cd /usr/java/
[root@centos-server java]# sh /root/java/jdk-6u25-linux-i586.bin
Khi cài đặt thành công chúng ta sẽ nhận được kết quả tương tư như dưới đây:
Java(TM) SE Development Kit 6 successfully installed.
Product Registration is FREE and includes many benefits:
* Notification of new versions, patches, and updates
* Special offers on Oracle products, services and training
* Access to early releases and documentation
Product and system data will be collected. If your configuration
supports a browser, the JDK Product Registration form will
be presented. If you do not register, none of this information
will be saved. You may also register your JDK later by
opening the register.html file (located in the JDK installation
directory) in a browser.
For more information on what data Registration collects and
how it is managed and used, see:
http://java.sun.com/javase/registration/JDKRegistrationPrivacy.html
Press Enter to continue…..
Tiếp đến chúng ta sẽ tiến hành thiết lập biến môi trường JAVA_HOME:
[root@centos-server java]# JAVA_HOME=/usr/java/jdk1.6.0_25/
[root@centos-server java]# export JAVA_HOME
[root@centos-server java]# PATH=$JAVA_HOME/bin:$PATH
[root@centos-server java]# export PATH
Để thiết lập biến JAVA_HOME cho người dùng vĩnh viễn chúng ta có thể thêm những trên vào tập tin ~/.bashrc hay ~/.bash_profile của người dùng và cũng có thể thêm vào /etc/profile để có hiệu lực cho tất cả người dùng. Kiểm tra lại bằng lệnh sau:
[root@centos-server java]# echo $JAVA_HOME
/usr/java/jdk1.6.0_25/
Bước 2: Cài đặt Apache Tomcat
Tải Apache Tomcat phiên bản 7 tại đây.
Chúng ta đã tải và lưu Apache Tomcat 7 vào thư mục /opt/, kế tiếp chúng ta sẽ tiến hành giải nén tập tin Apache Tomcat vừa tải được:
[root@centos-server java]# cd /opt/
[root@centos-server opt]# tar -xvf apache-tomcat-7.0.12.tar.gz
Kết thúc chúng giải nén được Apache Tomcat 7 nằm tại: /opt/apache-tomcat-7.0.12/
Bước 3: Cấu hình Apache Tomcat chạy như một dịch vụ
Để Apache Tomcat có thể dễ dàng Start, Stop, Restart và tự động chạy khi Centos khởi động nên chúng ta tạo đoạn init script như sau:
[root@centos-server opt]# vi /etc/init.d/tomcat
#!/bin/bash
# description: Tomcat Start Stop Restart
# processname: tomcat
# chkconfig: 234 20 80
JAVA_HOME=/usr/java/jdk1.6.0_25
export JAVA_HOME
PATH=$JAVA_HOME/bin:$PATH
export PATH
CATALINA_HOME=/opt/apache-tomcat-7.0.12
case $1 in
start)
sh $CATALINA_HOME/bin/startup.sh
;;
stop)
sh $CATALINA_HOME/bin/shutdown.sh
;;
restart)
sh $CATALINA_HOME/bin/shutdown.sh
sleep 1
sh $CATALINA_HOME/bin/startup.sh
;;
esac
exit 0
Trong đoạn script trên biến CATALINA_HOME phải trỏ về thư mục chứa Apache Tomcat (/opt/apache-tomcat-7.0.12/)
Cấp quyền thực thi cho tập tin /etc/init.d/tomcat :
[root@centos-server opt]# chmod +x /etc/init.d/tomcat
Tiếp tục sử dụng công cụ chkconfig để cấu hình cho Tomcat chạy lúc Centos khởi động ( ở đây ví dụ Tomcat tự động chạy ở runlevel 2,3,4) :
[root@centos-server opt]# chkconfig –add tomcat
[root@centos-server opt]# chkconfig –level 234 tomcat on
Kiểm tra lại:
[root@centos-server opt]# chkconfig –list tomcat
tomcat 0:off 1:off 2:on 3:on 4:on 5:off 6:off
Bây giờ chúng ta sẽ tiến hành Start Apache Tomcat:
[root@centos-server opt]# service tomcat start
Using CATALINA_BASE: /opt/apache-tomcat-7.0.12
Using CATALINA_HOME: /opt/apache-tomcat-7.0.12
Using CATALINA_TMPDIR: /opt/apache-tomcat-7.0.12/temp
Using JRE_HOME: /usr/java/jdk1.6.0_25
Using CLASSPATH: /opt/apache-tomcat-7.0.12/bin/bootstrap.jar:/opt/apache-tomcat-7.0.12/bin/tomcat-juli.jar
Chúng ta truy cập bằng HTTP vào cổng mặc định 8080 để kiếm tra ( ví dụ http://192.168.1.3:8080). Nếu Apache Tomcat start thành công sẽ nhìn thấy tương tự như sau:
Apache Tomcat 7
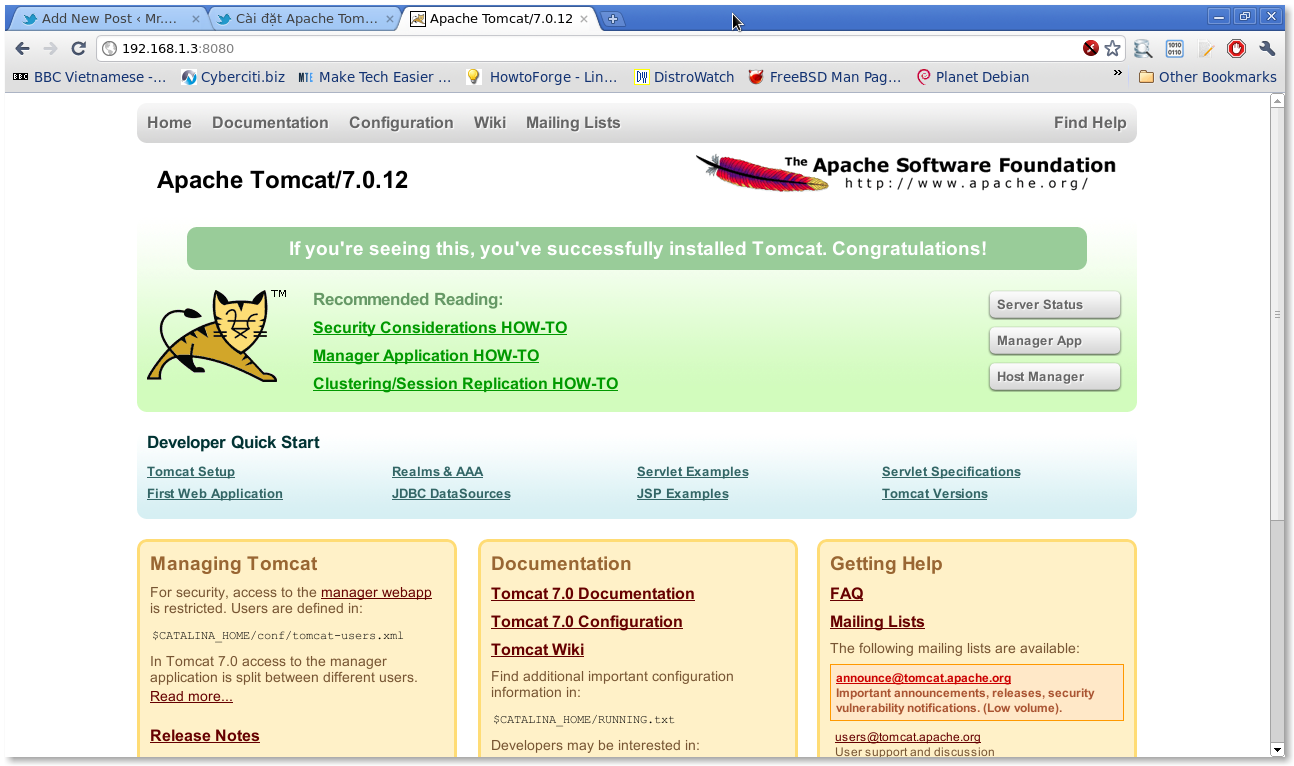
Nếu Apache Tomcat không start được thì vui lòng kiểm tra lỗi tại /opt/apache-tomcat-7.0.12/logs/catalina.out
Bước 4: Cấu hình truy cập Tomcat Manager
Vì lí do bảo mật Apache Tomcat 7 không tạo sẵn bất kì người dùng và mật khẩu mặc định nào cho Tomcat Manager. Nếu như chúng ta muốn sử dụng thì chỉnh sửa nội dung tập tin $CATALINA_HOME/conf/tomcat-users.xml
[root@centos-server /]# vi /opt/apache-tomcat-7.0.12/conf/tomcat-users.xml
Nội dung tập tin tomcat-users.xml
Với role “manager-gui” chúng ta có thể truy cập vào Manager App và Server Status như hình dưới đây:
Tomcat Manager 7
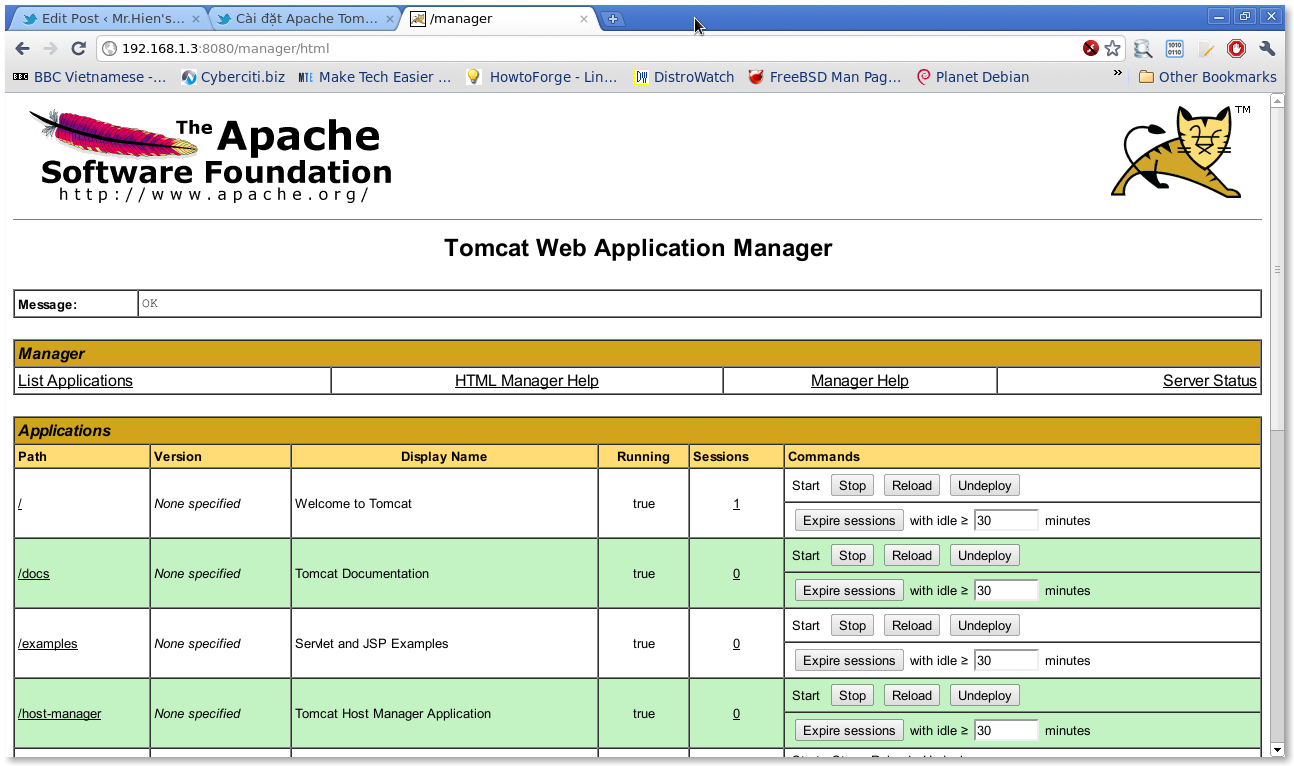
Apache Tomcat 7 còn có các role khác như : admin-gui, admin-script…
Khi chỉnh sửa tập tin tomcat-users.xml vui lòng restart Apache Tomcat lại để có hiệu lực.
Bước 5: Cấu hình Apache Tomcat chạy dưới quyền người dùng bình thường
Chúng ta tạo người dùng tên “tomcat” và gán quyển thư mục Apache Tomcat cho người dùng “tomcat”:
[root@centos-server /]# useradd -d /opt/apache-tomcat-7.0.12 tomcat
[root@centos-server /]# chown -R tomcat:tomcat /opt/apache-tomcat-7.0.12/
Và tiến hành chỉnh sửa tập tin /etc/init.d/tomcat thành như sau:
#!/bin/bash
# description: Tomcat Start Stop Restart
# processname: tomcat
# chkconfig: 234 20 80
JAVA_HOME=/usr/java/jdk1.6.0_25
export JAVA_HOME
PATH=$JAVA_HOME/bin:$PATH
export PATH
CATALINA_HOME=/opt/apache-tomcat-7.0.12
case $1 in
start)
/bin/su tomcat $CATALINA_HOME/bin/startup.sh
;;
stop)
/bin/su tomcat sh $CATALINA_HOME/bin/shutdown.sh
;;
restart)
/bin/su tomcat sh $CATALINA_HOME/bin/shutdown.sh
sleep 1
/bin/su tomcat sh $CATALINA_HOME/bin/startup.sh
;;
esac
exit 0
Bước 6: Cấu hình Apache Tomcat chạy cổng 80 với quyền người dùng bình thường
Trong Linux để chạy cổng dưới 1024 thì cần quyền root tuy nhiên chúng ta có thể sử dụng iptables để giải quyển vấn đề này như sau:
[root@centos-server /]# iptables -t nat -A PREROUTING -p tcp -m tcp –dport 80 -j REDIRECT –to-ports 8080
Bài viết đến đây là kết thúc. Mọi đóng góp xin gửi về admin[at]mrhien[dot]info . Xin chân thành cảm ơn.

 Nguon Internet.

khong share duoc may in tren windows xp


Wednesday, September 14, 2011

Không Start được service Windown firewall/ Internet connetion sharing( ICS)

Start => Run => gõ lệnh netsh winsock reset rùi ok. reset lại máy là oke

Nguon Internet.

Thursday, July 14, 2011

Setup Openvpn server on Centos

Install OpenVPN and create virtual private network.

This example is based on the environment below.
( [172.16.2.1] is private range's IP, but I use it to explain, pleae look it as your own grobal IP.)

(1) VPN Server
[172.16.2.1]
- Grobal IP address

[192.168.0.17]
- eth0

[192.168.0.4]
- br0 - create it for bridge

(2) VPN Client(Windows)
[10.0.0.2]
- original one

[192.168.0.??]
- given from VPN server


By the way, it's neccesary to set some configs on your router for NAT/Port forwarding. The used protocol and listening port by default on VPN server is UDP/1194. Speaking on an example here, a request to 1194 with UDP from internet is needed to forward to 192.168.0.4/1194 in LAN.

[1] Install and configure OpenVPN
# install from DAG

[root@ns ~]#
yum --enablerepo=dag -y install openvpn bridge-utils

[root@ns ~]#
cp /usr/share/doc/openvpn-2.0.9/sample-config-files/server.conf /etc/openvpn/

[root@ns ~]#
vi /etc/openvpn/server.conf


# line 53: change

dev
tap0


# line 78: change

ca
/etc/openvpn/easy-rsa/keys/ca.crt

cert
/etc/openvpn/easy-rsa/keys/server.crt

key
/etc/openvpn/easy-rsa/keys/server.key


# line 87: change

dh
/etc/openvpn/easy-rsa/keys/dh1024.pem


# line 96: make it comment

#
server 10.8.0.0 255.255.255.0

# line 103: make it comment

#
ifconfig-pool-persist ipp.txt

# line 115: change ( [VPN server's IP] [subnetmask] [IP range given to client] )

server-bridge
192.168.0.4 255.255.255.0 192.168.0.50 192.168.0.100


# line 125: change ( [VPN server's network] [subnetmask] )

push "route
192.168.0.0 255.255.255.0
"

# line 267: change

status
/var/log/openvpn-status.log


# line 276: change

log
/var/log/openvpn.log

log-append
/var/log/openvpn.log
[2] Create CA Certificate and key
[root@ns ~]#
cp -r /usr/share/doc/openvpn-2.0.9/easy-rsa /etc/openvpn/

[root@ns ~]#
cd /etc/openvpn/easy-rsa/

[root@ns easy-rsa]#
mkdir keys

[root@ns easy-rsa]#
vi vars


# line 45: change for your environment

export KEY_COUNTRY=
JP

export KEY_PROVINCE=
Hiroshima

export KEY_CITY=
Hiroshima

export KEY_ORG="
server-linux.info
"
export KEY_EMAIL="
root@server-linux.info
"

[root@ns easy-rsa]#
chmod 700 vars

[root@ns easy-rsa]#
. ./vars

NOTE: when you run ./clean-all, I will be doing a rm -rf on /etc/openvpn/easy-rsa/keys
[root@ns easy-rsa]#
chmod 700 clean-all

[root@ns easy-rsa]#
./clean-all

[root@ns easy-rsa]#
chmod 700 build-ca

[root@ns easy-rsa]#
./build-ca

Generating a 1024 bit RSA private key
.........................................++++++
...............................++++++
writing new private key to 'ca.key'
-----
You are about to be asked to enter information that will be incorporated
into your certificate request.
What you are about to enter is what is called a Distinguished Name or a DN.
There are quite a few fields but you can leave some blank
For some fields there will be a default value,
If you enter '.', the field will be left blank.
-----
Country Name (2 letter code) [JP]:
# Enter

State or Province Name (full name) [Hiroshima]:
# Enter

Locality Name (eg, city) [Hiroshima]:
# Enter

Organization Name (eg, company) [server-linux.info]:
# Enter

Organizational Unit Name (eg, section) []:
# Enter

Common Name (eg, your name or your server's hostname) []:
server-ca
 
# input

Email Address [root@server-linux.info]:
# Enter
[3] "ca.crt" is created under /etc/openvpn/easy-rsa/keys/. Please download it on your client PC by FTP or SFTP.

[4] Create server Certificate and key
[root@ns easy-rsa]#
chmod 700 build-key-server

[root@ns easy-rsa]#
./build-key-server server

Generating a 1024 bit RSA private key
....++++++
.......................++++++
writing new private key to 'server.key'
-----
You are about to be asked to enter information that will be incorporated
into your certificate request.
What you are about to enter is what is called a Distinguished Name or a DN.
There are quite a few fields but you can leave some blank
For some fields there will be a default value,
If you enter '.', the field will be left blank.
-----
Country Name (2 letter code) [JP]:
# Enter

State or Province Name (full name) [Hiroshima]:
# Enter

Locality Name (eg, city) [Hiroshima]:
# Enter

Organization Name (eg, company) [server-linux.info]:
# Enter

Organizational Unit Name (eg, section) []:
# Enter

Common Name (eg, your name or your server's hostname) []:
server
 
# input

Email Address [root@server-linux.info]:
# Enter


Please enter the following 'extra' attributes
to be sent with your certificate request
A challenge password []:
# Enter

An optional company name []:
# Enter

Using configuration from /etc/openvpn/easy-rsa/openssl.cnf
Check that the request matches the signature
Signature ok
The Subject's Distinguished Name is as follows
countryName
:PRINTABLE:'JP'

stateOrProvinceName
:PRINTABLE:'Hiroshima'

localityName
:PRINTABLE:'Hiroshima'

organizationName
:PRINTABLE:'server-linux.info'

commonName
:PRINTABLE:'server'

emailAddress
:IA5STRING:'root@server-linux.info'

Certificate is to be certified until Sep 4 14:11:20 2018 GMT (3650 days)
Sign the certificate? [y/n]:
y


1 out of 1 certificate requests certified, commit? [y/n]
y

Write out database with 1 new entries
Data Base Updated
[5] create Diffie Hellman ( DH )
[root@ns easy-rsa]#
chmod 700 build-dh

[root@ns easy-rsa]#
./build-dh

Generating DH parameters, 1024 bit long safe prime, generator 2
This is going to take a long time
[6] Create client Certificate and key
[root@ns easy-rsa]#
chmod 700 build-key-pass

[root@ns easy-rsa]#
./build-key-pass client

Generating a 1024 bit RSA private key
......++++++
.......................++++++
writing new private key to 'client.key'
Enter PEM pass phrase:
# set pass-phrase

Verifying - Enter PEM pass phrase:
# verify

-----
You are about to be asked to enter information that will be incorporated
into your certificate request.
What you are about to enter is what is called a Distinguished Name or a DN.
There are quite a few fields but you can leave some blank
For some fields there will be a default value,
If you enter '.', the field will be left blank.
-----
Country Name (2 letter code) [JP]:
# Enter

State or Province Name (full name) [Hiroshima]:
# Enter

Locality Name (eg, city) [Hiroshima]:
# Enter

Organization Name (eg, company) [server-linux.info]:
# Enter

Organizational Unit Name (eg, section) []:
# Enter

Common Name (eg, your name or your server's hostname) []:
client
 
# input

Email Address [root@server-linux.info]:
# Enter


Please enter the following 'extra' attributes
to be sent with your certificate request
A challenge password []:
# Enter

An optional company name []:
# Enter

Using configuration from /etc/openvpn/easy-rsa/openssl.cnf
Check that the request matches the signature
Signature ok
The Subject's Distinguished Name is as follows
countryName
:PRINTABLE:'JP'

stateOrProvinceName
:PRINTABLE:'Hiroshima'

localityName
:PRINTABLE:'Hiroshima'

organizationName
:PRINTABLE:'server-linux.info'

commonName
:PRINTABLE:'client'

emailAddress
:IA5STRING:'root@server-linux.info'

Certificate is to be certified until Sep 4 14:20:52 2018 GMT (3650 days)
Sign the certificate? [y/n]:
y


1 out of 1 certificate requests certified, commit? [y/n]
y

Write out database with 1 new entries
Data Base Updated
[7] "client.crt" and "client.key" are created under /etc/openvpn/easy-rsa/keys/. Please download them on your client PC by FTP or SFTP.

[8] Create bridge networking and starting script for VPN server.
[root@ns ~]#
cp /usr/share/doc/openvpn-2.0.9/sample-scripts/openvpn.init /etc/openvpn/

[root@ns ~]#
cp /usr/share/doc/openvpn-2.0.9/sample-scripts/bridge-stop /etc/openvpn/

[root@ns ~]#
cp /usr/share/doc/openvpn-2.0.9/sample-scripts/bridge-start /etc/openvpn/

[root@ns ~]#
chmod 755 /etc/openvpn/bridge-start

[root@ns ~]#
chmod 755 /etc/openvpn/bridge-stop

[root@ns ~]#
chmod 755 /etc/openvpn/openvpn.init

[root@ns ~]#
vi /etc/openvpn/bridge-start


# 18,19,20: change ( IP for bridge : subnetmask : broadcast address )

eth_ip="
192.168.0.4
"
eth_netmask="
255.255.255.0
"
eth_broadcast="
192.168.0.255
"

[root@ns ~]#
vi /etc/sysctl.conf


# line 7: change ( enable ip forward )

net.ipv4.ip_forward =
1


[root@ns ~]#
cp /etc/rc.d/init.d/network /etc/rc.d/init.d/vpn

[root@ns ~]#
vi /etc/rc.d/init.d/vpn


# line 168: add these 2 lines

/etc/openvpn/bridge-start
/etc/openvpn/openvpn.init start


# line 174: add these 2 lines

  stop)
/etc/openvpn/openvpn.init stop
/etc/openvpn/bridge-stop


[root@ns ~]#
/etc/rc.d/init.d/vpn start

Bringing up loopback interface:
[  OK  ]

Bringing up interface eth0:
[  OK  ]

Bringing up interface eth1:
[  OK  ]

Wed Sep 3 23:05:57 2008 TUN/TAP device tap0 opened
Wed Sep 3 23:05:57 2008 Persist state set to: ON
Starting openvpn:
[  OK  ]

[root@ns ~]#
chkconfig --add vpn

[root@ns ~]#
chkconfig vpn on

Monday, July 11, 2011

Đồng bộ dữ liệu trên 2 Database Server sử dụng MySQL Server

Trong bài viết trước, mình có trình bày các Đồng bộ hóa dữ liệu trên 2 Database Server dùng SQL Server 2008. Trong bài viết này, mình sẽ tiếp tục trình bày các để đồng bộ dữ liệu giữa 2 Database Server sử dụng MySQL Server (MySQL Replication), thực hiện trên hệ điều hành CentOS 5.6
Trong mô hình này. Một Server sẽ đóng vai trò là MASTER, Server kia đóng vai trò là SLAVE.

Yêu cầu 2 Server:
  • Đã cài đặt MySQL
Cấu hình chung:
  • Server 1 có địa chỉ IP là: 192.168.1.131
  • Server 2 có địa chỉ IP là: 192.168.1.137
  • Database trên 2 Server cần đồng bộ có tên: dulieumau
1) Cấu hình MASTER (Server1):

Đánh lệnh để sửa lại nội dung file my.cnf
vi /etc/my.cnf

Đầu tiên bạn cần chắc chắn rằng 2 dòng sau của file my.cnf đã được commnet hoặc được xóa bỏ
#skip-networking
#bind-address = 127.0.0.1


Tiếp đó, trong thẻ [mysqld] thêm vào nội dung sau:
log-bin
binlog-do-db=dulieumau
server-id=1


Trong đó binlog-do-db ta cho biết dữ liệu cần đồng bộ.

 Sau đó ta khởi động lại MySQL. Gõ lệnh:
service mysqld restart

Tiếp theo, đăng nhập vào MySQL trên Server 1 bằng tài khoản root
mysqld -u root -p

 Tạo một user để Server 2 đăng nhập và có thể Replicate
GRANT REPLICATION SLAVE ON *.* TO 'slave'@'%' IDENTIFIED BY '123456';

 Trong dòng lệnh trên thì Username là slave và mật khẩu là 123456

Để đảm bảo tính nhất quán dữ liệu giữa 2 database trên Server1 và Server2. Ta tiến hành ngưng các tác động làm thay đổi cơ sở dữ liệu.
FLUSH TABLES WITH READ LOCK;

Tiếp tục, Xem file log của cơ sỡ dữ liệu "dulieumau" hiện tại để slave biết bắt đầu replicate tại thời điểm nào.
SHOW MASTER STATUS;
Ví dụ ở đây ta có kết quả như hình dưới đây.

 Chúng ta cần lưu lại 2 tham số của cột File và Position để cấu hình cho SLAVE.

2) Cấu hình SLAVE (Server 2):

Chú ý: Nếu như trước khi bạn thiết lập Replication này mà database cần Replicate của bạn đã có sẵn dữ liệu trên Server 1 thì bạn cần sao chép database này sang Server 2!
Bạn có thể thực hiện việc này bằng cách sao lưu và backup bằng tay từ server 1 sang server 2 hoặc có thể đánh lệnh sau trong server 2
LOAD DATA FROM MASTER;
==> Đảm bảo trước khi cấu hình đồng bộ hóa thì database ở 2 server là giống nhau!

Trên SLAVE  mở và thêm đoạn sau vào nội dung file my.cnf
server-id=2
master-host=192.168.1.155
master-user=slave1
master-password=123456
master-port=3306
master-connect-retry=60
replicate-do-db= dulieumau

 Trong đó:
master-host= IP hoặc domain của MASTER
master-user= Tài khoản để SLAVE đăng nhập vào MASTER được tạo ở bước trên
master-password= là mật khẩu của User đó

Sau đó khởi động lại MySQL
service mysqld restart

Đăng nhập vào MySQL bằng quyền root
mysql -u root -p

Nếu Server 2 hiện đang là 1 SLAVE đang hoạt động thì ta tạm dừng nó lại
SLAVE STOP;

Cấu hình những thông tin cần thiết để SLAVE giao tiếp được với MASTER:
CHANGE MASTER TO
-> MASTER_HOST='192.168.1.155',
-> MASTER_USER='slave1',
-> MASTER_PASSWORD='123456',
-> MASTER_LOG_FILE='mysqld-bin.000001',
-> MASTER_LOG_POS=98;

với MASTER_LOG_FILE và MASTER_LOG_POS là hai tham số có giá trị được ta lưu lại ở bước phía trên!

Khởi động lại SLAVE:
SLAVE START;

 Giải phóng các Tables trên MASTER (Server 1).
UNLOCK TABLES;

 3) Testing:
Khi ta tiến hành thay đổi dữ liệu trên dulieumau ở Server 1 thì dulieumau trên Server 2 cũng thay đổi theo y như vậy! ==> Thành công!

 * Một số lệnh để xem logs và kiểm tra hoạt động trên MASTER và SLAVE:
-------- MASTER:
mysql> SHOW GRANTS FOR repl;
mysql> SHOW MASTER LOGS \G
mysql> SHOW BINARY LOGS;
mysql> SHOW MASTER STATUS;
mysql> RESET MASTER ---> ( CAUTON !!! )
-------- SLAVE:
mysql> SHOW SLAVE STATUS;
mysql> STOP SLAVE;
mysql> START SLAVE;
mysql> RESET SLAVE;

4) MySQL Replication theo 2 chiều:
Các bước cấu hình mình đã trình bày ở trên sẽ giúp đồng bộ dữ liệu mỗi khi Database trên Server 1 được thay đổi. Tuy nhiên nếu dữ liệu ở trên Server 2 thay đổi thì Server 1 không có được những thay đổi này! Đó là replication một chiều (MASTER --> SLAVE)
Để có thể replication chiều (MASTER <--> MASTER) ta tiến hành cấu hình 2 mô hình MASTER-SLAVE replication lồng vào nhau:
Bước 1: Server 1 là MASTER, server 2 là SLAVE
Bước 2: Server 1 là SLAVE, server 2 là MASTER

2 bước này cấu hình hoàn toàn tương tự như mình đã trình bày ở bên trên!

Ngô Duy Khánh (Kenhgiaiphap.Vn)